This post contains affiliate links, which means if you purchase something through my link, I will earn a small commission. This does not affect the price you pay for the item. I only advertise products that I have used myself and would genuinely recommend!
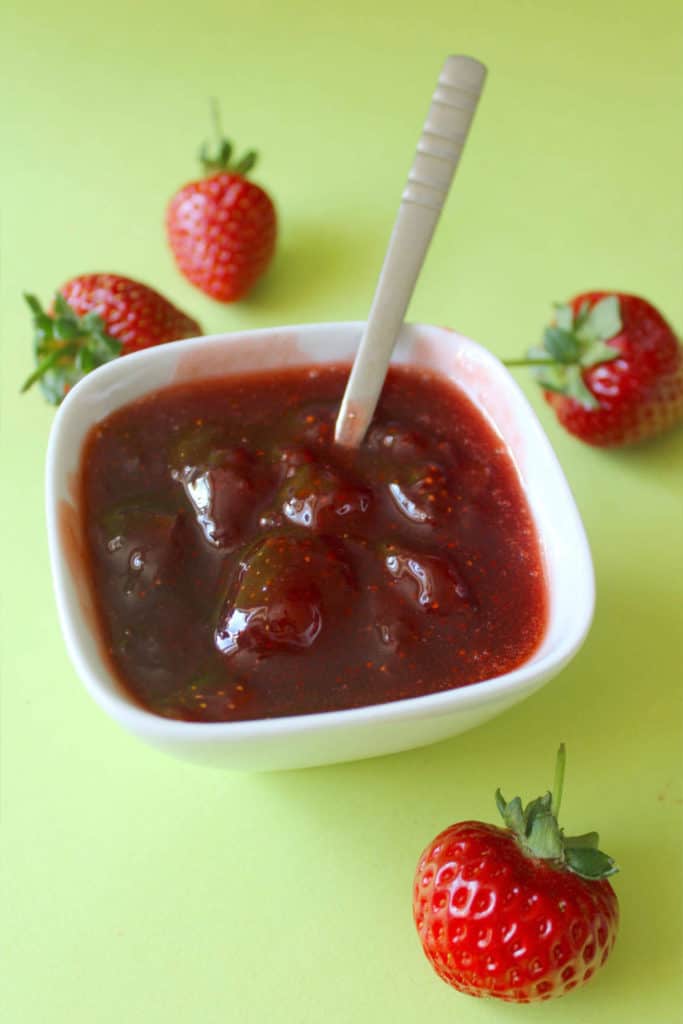
Homemade strawberry jam is delicious. The freshness and fragrance is entirely distinct to the shop bought version. Using just three easy to find ingredients, this small-batch jam is fast to make too!
I used to associate jam making with some huge process involving a massive cauldron-like pan, dozens of jars and lots of sterilising steps. Fortunately, that idea was wrong. Great tasting jam can be easy and fast with the right recipe.
Small batch jam avoids most of the work and has some additional benefits too. Like using more fruit and less sugar, and cooking less to preserve more flavour.
If you want to easily make a couple of decent size jars, then keep them in the fridge and eat them over the next month or so – this simple strawberry jam recipe is perfect for you.
As for what to do with it – one of our favourites is my classic Victoria sponge cake filled with jam and buttercream, or spread it on English pancakes. It also makes a fantastic home made gift.
Reduced sugar jam has advantages
My small batch jam is made with less sugar. The usual jam ratio is 1 : 1 fruit to sugar. However, I’m using 1 : 0.875. It’s still very sweet and has that classic jam flavour profile, but a jam with more fruit in it results in more flavour.
Picking the best strawberries for jam making
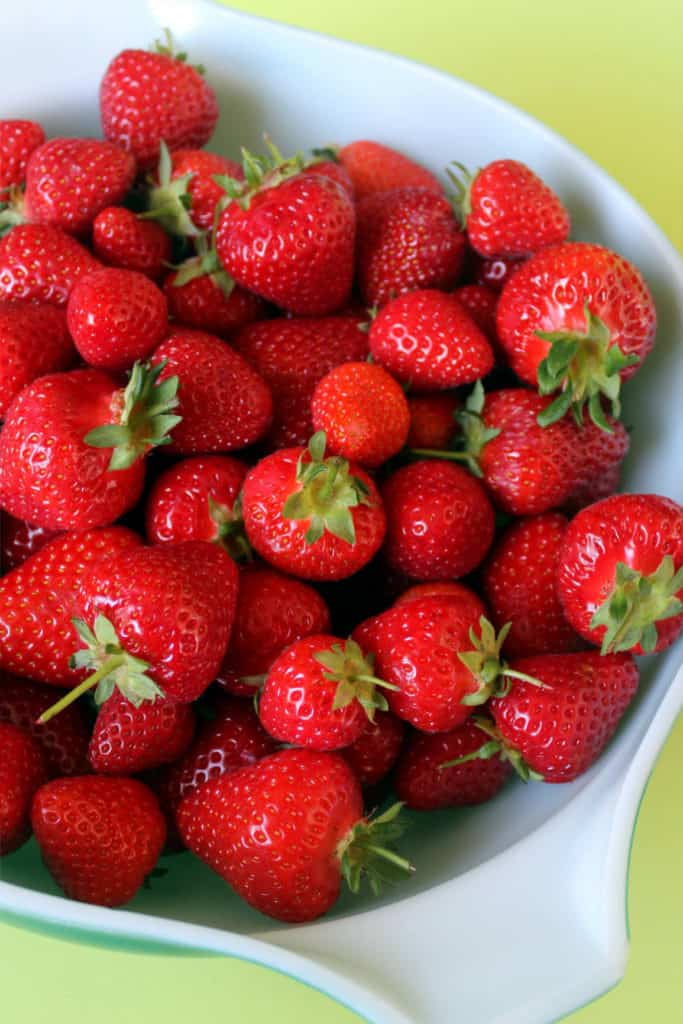
To find the best strawberries look for freshness, ripeness and fragrance.
Freshness is indicated by plump, shiny strawberries with fresh green leaves. Inspect the box carefully, and look through the sides and bottom if it’s clear plastic to see the hidden strawberries. Any mould will give a musty taste.
Ripeness is indicated by strawberries with a deep red colour and little or no white flesh below the leaves. Strawberries don’t continue to ripen after they are picked, so it’s important they’re already ripe when you buy them.
The intensity of their aroma indicates the intensity of their flavour. Good strawberries are intensely fragrant. However, if they’re chilled the aroma will be dulled a little until they warm up again.

The strawberries above are excellent. Perfectly ripe and fresh at the same time. They were grown locally and picked at the peak of their ripeness.
Where I live strawberries are in season from May to September – with a peak around June/July. Whatever your season, that’s the best time to buy them, when they’re abundant and at their best. The further you go out of season the further the available fruit has travelled to reach you. This extra time can impact freshness. Also, ripe fruit is more fragile and it has a shorter shelf life, so exported fruits tend to be picked when they’re a little unripe.
How to cook the best strawberry jam
I used to know a lady who made amazing jam. We literally called her ‘the jam lady’, because we knew her from her stall at the market where she sold all kinds of flavours. Apparently, she was a jam making fanatic and had been making home made jam every day for decades! Her blackcurrant was the best I’ve ever tasted.
Fortunately, although I didn’t make much jam back then I did ask her how she made it so good. The answer? Cook it gently. That, apparently, was it.
I know her experience was a big part of it too, but her simple advice has served me well. A lot of recipes encourage heavy boiling, but you don’t need to. Sometimes, less is more.
We cook jam to first soften the fruit, then to dissolve the sugar. After that the cooking continues and the sugar largely breaks down in to glucose and fructose – an essential and desirable change that results in smooth jam. Throughout all of this cooking the water content is reducing too – until finally you hit the magic ratio of sugar to water that makes a jam which sets.
Reaching this magic ratio with less heat means less breakdown of the flavour molecules. This is why I recommend cooking relatively gently and using a tall-sided frying pan. The large surface area of the frying pan allows more water to evaporate.
So despite cooking it fairly gently, don’t be fooled – this jam can cook down fast!
A thick-bottom frying pan that distributes heat well is a massive help for this recipe.
Quality pans make a real difference in the kitchen. My favourite pans by far are Meyer Circulon. Their thick, solid bases deliver even heat, and their non-stick coatings just keep going.

You can check out the pan I’m using for this recipe here – Meyer Circulon Infinite Frypan 30 cm
Test your jam regularly during cooking, and always remove from the heat during testing to avoid over-cooking.
Home Made Strawberry Jam (small-batch)
Ingredients
- 800 g fresh strawberries
- 650-700 g granulated white sugar
- 1 tablespoon lemon juice
Instructions
- Place a saucer in the freezer to chill.
- Prepare the strawberries by removing and discarding any leaves and stalks, then cut them in to small chunks. Weigh the prepared strawberries to determine the amount of sugar you'll need. For each gram of fruit use 0.875g of sugar. My prepared fruit weighed 750g, so I'm using 656g of sugar for this batch.Example calculation: 750 x 0.875 = 656
- Place the prepared strawberries and lemon juice into a tall-sided frying pan (roughly 30cm diameter is good), and cook over a medium heat until soft. Takes about 5 minutes.
- Once the fruit is cooked, add the sugar to the frying pan. Stir in, turn up the heat and bring to a boil. Once boiling, immediately reduce the heat to a steady simmer and cook – with regular stirring – for 5 minutes. Remove from the heat and test the jam by dropping a little on the cold saucer. Leave for 30 seconds, then run your finger through the drop. If it wrinkles and feels tacky – it’s ready and you can proceed to the next step. If not, return to the heat and cook for 1 minute more, then remove from the heat and do the wrinkle test again. Repeat until ready.
- When the jam is ready, skim off and discard any foam that has formed, then set it aside to cool for 10 minutes before spooning in to well cleaned jars. Allow these to fully cool and set. While cooling you can loosely cover the jars with a cloth if needed, but don't put lids on or refrigerate until completely cool.
Notes
Have you tried this home made strawberry jam or have any questions? I’d love to hear your thoughts in the comments below.


This looks so good! I’ve never had homemade jam before, but I love anything strawberry. I’ll have to try this recipe out ASAP!
Hi Payton, if you love strawberry then homemade strawberry jam is going to be great. Choose some good strawberries and it will be packed with flavour.