This post contains affiliate links, which means if you purchase something through my link, I will earn a small commission. This does not affect the price you pay for the item. I only advertise products that I have used myself and would genuinely recommend!
Cooking Japanese rice is one of my favourite things because it’s the kind of cooking that takes a little planning ahead, then everything comes together to create perfect rice.
It’s an important skill for anyone exploring Japanese food. Rice is such a ubiquitous component of Japanese dishes that you’ll get to use the skill again and again, and perfect rice will raise the quality of your cooking greatly.
What is Japanese rice?
Japanese rice (aka Uruchimai) is a short-grain rice that’s used extensively in savoury dishes throughout Japanese cuisine. Often it’s served as a simple side dish to a curry or stir-fry. However, it’s also the rice used in sushi, which is why it’s typically sold in English speaking regions as ‘sushi rice’.
Key physical characteristics are its short grain length and wide diameter. Also, its sticky texture when cooked, which allows it to cling together so that it can be eaten with chopsticks. Often people simply call this ‘sticky rice’ and will ask me ‘how to make sticky rice’.
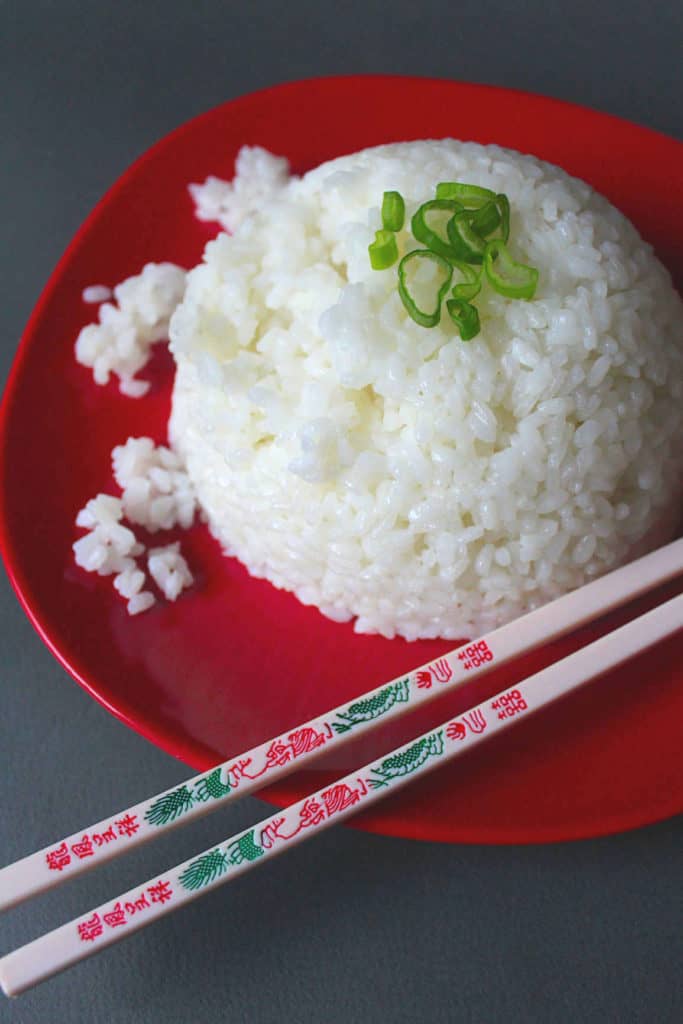
Perfectly prepared Japanese rice should be light, fluffy, and just sticky enough to eat with chopsticks.
Here, I’m explaining the traditional cooking method that simply uses a saucepan with a lid. It’s easy enough to cook rice on the stove, and it doesn’t require any extra kitchen gadgets.

My favourite rice for Japanese cookery is Yutaka’s sushi rice. It’s an excellent, Japanese-style rice with the perfect amount of stickiness for serving with a curry or stir-fry, or making great sushi.
It’s a bit harder to find in the shops, so I buy it on Amazon. The price will likely change over time, so click this link to check the current price.
Preparing the rice
First, the rice is washed by placing it in water, swirling it around, then draining it. This step removes excess surface starch and dust. How much to wash it depends on how dusty your rice is, so go by look and feel. When the washing water is only a little cloudy, you’re done. I’ve found 3-5 washes is typical.
At this point the rice is placed in the saucepan with the measured quantity of water it will be cooked in. The rice to water ratio depends on the type of rice you’re cooking, but for Japanese style rice, I recommend 125g of water for every 75g of rice. Weighing both rice and water is most accurate.
Some people swear by letting their rice soak for 30 minutes at this stage before cooking it, and others don’t mention soaking at all.
I’ve tried both methods and I found little difference, so I just go ahead and cook it right away.
How to cook Japanese rice
Cover the pan with a lid and place it on medium-high heat until it boils. The moment it’s boiling reduce the heat to low and simmer the rice for 15 minutes. The goal is is a sort of lazy bubbling, light simmering. During this time the lid is never removed. Since there’s no stirring, it’s best to use a heavy bottom pan that distributes the heat well. A glass lid, so you can see when the water starts to boil, and then how it’s simmering, is a big help too.
Once the 15 minutes simmering is complete, the pan is moved off the heat and set aside for another 15 minutes. The lid stays on, and the rice continues to cook from the residual steam trapped in the pan. I find this two-step cooking method interesting because it’s both boiled rice and steamed rice.
After the steaming step, you can take the lid off and the rice can be served. It should have the perfect combination of textures – sticky, yet light, with well-defined grains.
To avoid damaging the grains it’s best to fluff and scoop the rice out with a soft utensil, like a rice paddle or silicone spatula.
Scaling this recipe up or down is simple enough in terms of multiplying the rice and water weight – but adapting for the cooking temperature/time to avoid undercooked rice is less obvious. After some experimenting, I’ve found it best to leave the time alone and instead adjust the temperature. It’s all about maintaining that light simmer.
You can serve this rice with many things, but one of my favourite ways is with peanut stir fry.
How to Cook Japanese Rice
Ingredients
- 150 g Japanese Rice (aka sushi rice)
- 250 g water (measured quantity for cooking)
Instructions
Washing the rice
- Place the rice in a bowl with plenty of water and stir with your hand until the water is cloudy. Discard the water and repeat 3-5 times, or until the water is clear. Drain the rice thoroughly.
Boiling the rice
- Add the rice and measured water to your saucepan and put the lid on. Bring the pan to a boil, then immediately turn the heat down to low and simmer for 15 minutes. (Keep the lid on the saucepan at all times). The crucial thing is to simmer your rice with a gentle, steady, light bubbling for 15 minutes.
Steaming the Rice
- Remove the saucepan from the heat (the lid stays on) and set it aside for a further 15 minutes so the residual steam completes the cooking.
Serving the rice
- Remove the saucepan's lid (yes, you're finally allowed to take it off!) and gently fluff the rice with a soft utensil – for example, a traditional wooden rice paddle, or a silicone spatula. If you want to mould it, like in the photo, lightly grease a bowl and gently press the rice into it before turning out on a plate.
Video
Notes
Have you tried this recipe for cooking Japanese rice or have your own method – I’d love to hear from you in the comments below!


This worked really well for me! I love how the sushi rice can be formed into a dome shape – it looks beautiful if you’re making a special meal to share with someone 🙂
Hi Kate, moulded rice does give a nice finish to the presentation. Thank you for your kind feedback 🙂
Hi Ben,
I watched the video, and it was easy to follow. I never really thought about how it was done before. I suppose this is because we are saturated with other supermarket types of rice, and I didn’t know any better.
My electric hob takes a while to get going, and for the temperature to lower. I will need to be careful.
Thanks
Lee
Hi Lee, it’s good to hear you’ve learnt something new from my post and video.
As for hobs – this is a very good point to emphasise again. This recipe needs a fairly quick temperature reduction, so if you’re using a hob that has some lag when you turn it down, plan ahead and don’t turn it up too high to start with. Better to be a little slower bringing it to the boil than end up with a runaway temperature situation where it keeps boiling too long and the rice overcooks. Using the smallest ring will also reduce the amount of lag since smaller rings store less heat.